Scanning the radio environment
Prerequisites
- 1 DCC
- 1 Operation laptop
- 1 antenna Unifi AP-HD
- 2 ethernet cables:
- 1 to interconnect the antenna and the DCC switch
- 1 to interconnect the laptop and the DCC switch
Steps
Please follow the steps described in DCC Installation.
When finished, connect the Unifi AP-HD antenna's main port to the DCC switch using an ethernet cable.
Connect to the Unifi Controller on the Operation laptop then fill-in the usual credential.
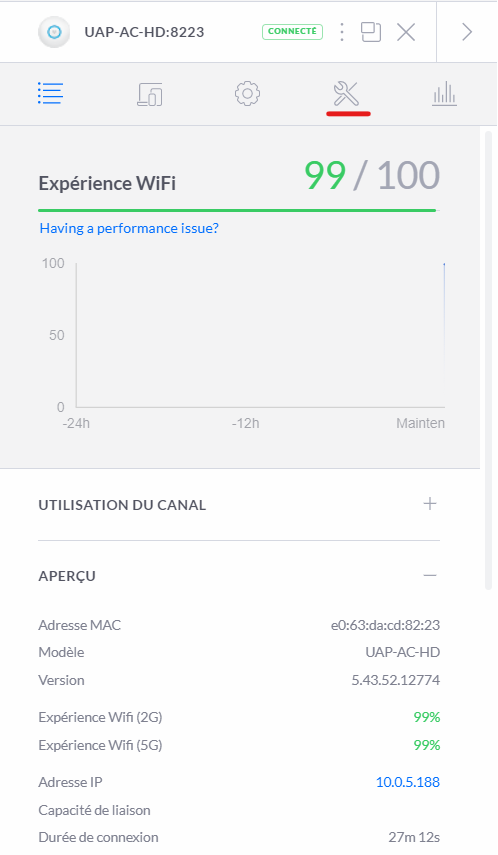
Navigate to the equipment tab on the left side of the ui.

Before radio scanning you should make sure that the antenna is adopted. If not, please refer to Equipment Adoption.
Once the antenna is selected you will have access to the menu below, select the hammer and screwdriver icon.
Click on the scan button to launch the scan process. This operation last between 5 and 10 minutes.
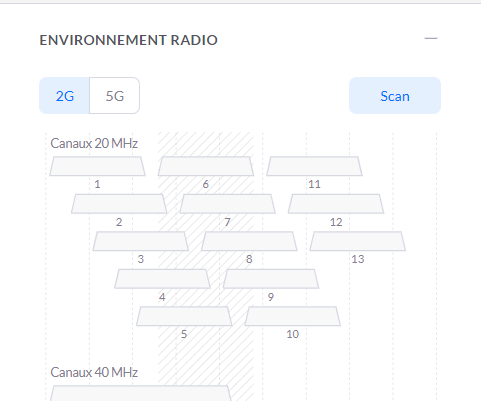
The antenna will be completely unavailable during the scan. Do not attempt to launch a scan during the setup phase or during a show.
Once the analysis is completed, the antenna will report the result for each canal. Below is an example of a radio scan result.

Moving the mouse cursor on each channel will display additional information.
Given the results, you can now choose the appropriate channel following the recommendations available on Wi-Fi channels