Timecode (or TC) is a technology enabling advanced temporal synchronisation in-between equipment. This protocol consists of on Master timecode whose task will be to generate the point of reference to be sent to N Slaves. Timecode can be used on our system to synchronise it with the rest of effects that may be present during a show. To do so, two different timecode equipment can be used: the Rosendahl Mif4 or the CB TC-5B-MIDI.
Prerequisites
- One operation laptop
- One DCC kit
- One RJ45 Cable
- One timecode unit (Rosendahl or CB) and its USB cable
- A timecode source
- A compatible bundle (Start with Timecode)
Installation
Rosendahl Mif4 as a slave
Interconnect the timecode unit and the DCC using the USB cable. The timecode unit should start automatically.
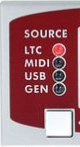
Multiple ways of transmitting timecode exists. The Rosendahl Mif4 can be used to receive a source through MIDI, although receiving it through LTC is more common. Select the appropriate source using the left button until the LED is selecting the correct mode.
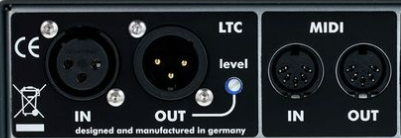
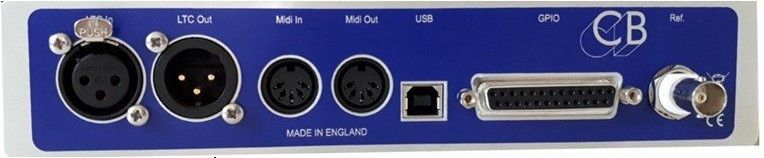
Interconnect the timecode unit to the master system using either a XLR or MIDI cable.
Using the Rosendahl Mif4 as a slave unit means that the connection to the master system will always be on one of the ports labelled IN on the back of the unit.
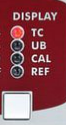
Double-check that the Display selector on the right side of the unit is locked on TC. If that's not the case, press the right button until the correct display mode is selected.
Rosendahl Mif4 as a master
Interconnect the timecode unit and the DCC using the USB cable. The timecode unit should start automatically.
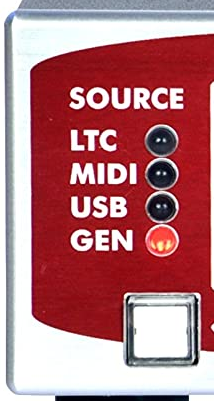
To use the Rosendahl Mif4 as a timecode source, select the GEN mode using the left button.
Double-check that the Display selector on the right side of the unit is locked on TC. If that's not the case, press the right button until the correct display mode is selected.
Using this mode, multiple DCCs can be synchronized by interconnecting multiple timecode unit, using the OUT ports located on the back of the master unit.
To set the timecode offset, maintain the left button pressed for a few seconds. The display will start blinking. While that's the case, pressing the left button will increase the currently selected value while pressing the right button will switch to the next value.
When the last value is selected, pressing the right button another time will start the timecode from the selected value !
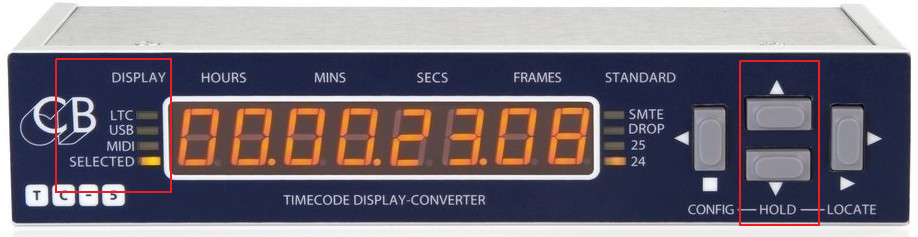
CB TC-5B-MIDI as a slave
Interconnect the timecode unit and the DCC using the USB cable. The timecode unit should start automatically.
Multiple ways of transmitting timecode exists. The CB TC-5B-MIDI can be used to receive a source through MIDI (untested), although receiving it through LTC is more common. Select the appropriate source using the up and down arrows.
To ensure that the correct configuration is loaded, maintain the left arrow pressed. After a few seconds, we can now navigate through the menus using the left and right arrows, as well as modifying the configuration values using the up and down arrows. Using the CB TC-5B-MIDI unit as a slave unit, double-check the following items:
Src: should be set toLTCorMIDIdepending on the source used.rEF: should be set toSrc.
Interconnect the timecode unit to the master system using the appropriate IN port located on the back of the unit.
CB TC-5B-MIDI as a master
Interconnect the timecode unit and the DCC using the USB cable. The timecode unit should start automatically.
To use the CB TC-5B-MIDI timecode unit as a source, select the SELECTED display mode using the up and down arrows.

To ensure that the correct configuration is loaded, maintain the left arrow pressed. After a few seconds, we can now navigate through the menus using the left and right arrows, as well as modifying the configuration values using the up and down arrows. Using the CB TC-5B-MIDI unit as a master unit, double-check the following items:
Src: should be set toUirrEF: should be set toSrc.
To change the timecode offset, maintain the right arrow button pressed for a few seconds, then use the left and right arrows to select the values. Changing the values can be done using the up and down arrows. When done, maintain the right arrow button for a few seconds to validate the new value.
Setting the value, may not work everytime. Double-check that the value you entered has been taken into account !
To reset the timecode value entered, hard-reset the unit by disconnecting the USB cable at the back of the unit.
Using a CB TC-5B-MIDI timecode unit as master, synchronizing multiple DCCs becomes possible using one of the OUT ports located at the back of the unit.
Usage
Now that the unit is properly configured, check that the unit is properly recognized by the system.
To do so, interconnect the operation laptop to the DCC switch.
After a few seconds, and using a web browser, navigate to http://10.0.0.100.
Load the compatible bundle on the DCC and select it using the scrolling menu.
Please note that the following icon in the list denoted a compatible bundle.

The bundle actions panel should appear. Because the bundle is timecode compatible some information will be available:

- ST or Start Time: is the value read in the bundle configuration files and at which the show will be started.
- TC or Timecode: is a compatible unit is connected, corresponds to the current value sent (received or generated) by the unit. If not, UNKNOWN will be printed instead.
Clicking on this button will show the timecode interface as well as more information. After making sure that the unit is recognized and that the frames are correctly received, the system is operational and ready to be started using timecode.
Always make sure that the Timecode is properly received by the system way before any flights !
Synchronisation of N DCCs
Because timecode units can be either master or slave, and that they can be interconnected together, synchronizing multiple DCCs becomes possible.
Connections
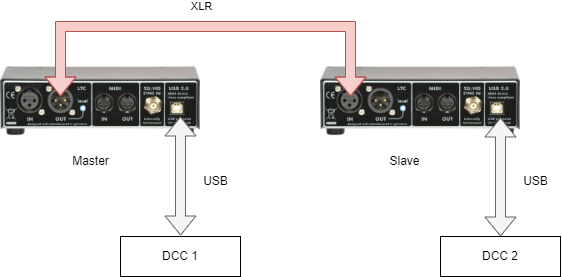
- The timecode master unit is connected to the master DCC using its USB cable.
- This unit being master, master configuration applies.
- The timecode slave unit is connected to the slave DCC using its USB cable.
- This unit being slave, slave configurations applies.
- The LTC OUT port of the timecode master unit is connected to the LTC IN port of the slave unit using an XLR cable.
- If needed, other units can be connected to the chain using the available OUT port on the slave unit.
- These units being slaves, slaves configurations applies.