How to flash a F9P GPS chip
This method is for advanced users only. Please make sure to know what you are doing.
A drone equipped with a F9P GPS having no fix as a status even with a good satellite reception and multiple reboot attempt.
Flashing multiple F9P chips simultaneously
This method should be prioritized over cable method discussed below.
Method
-
Make sure that all drones switched on and displayed on the DCC are drones whose F9P chip needs to be flashed.
-
Navigate onto the View admin via the DCC hub. You need to be logged in as an admin. The connexion button is located at the top right of the DCC hub. This will let you access the
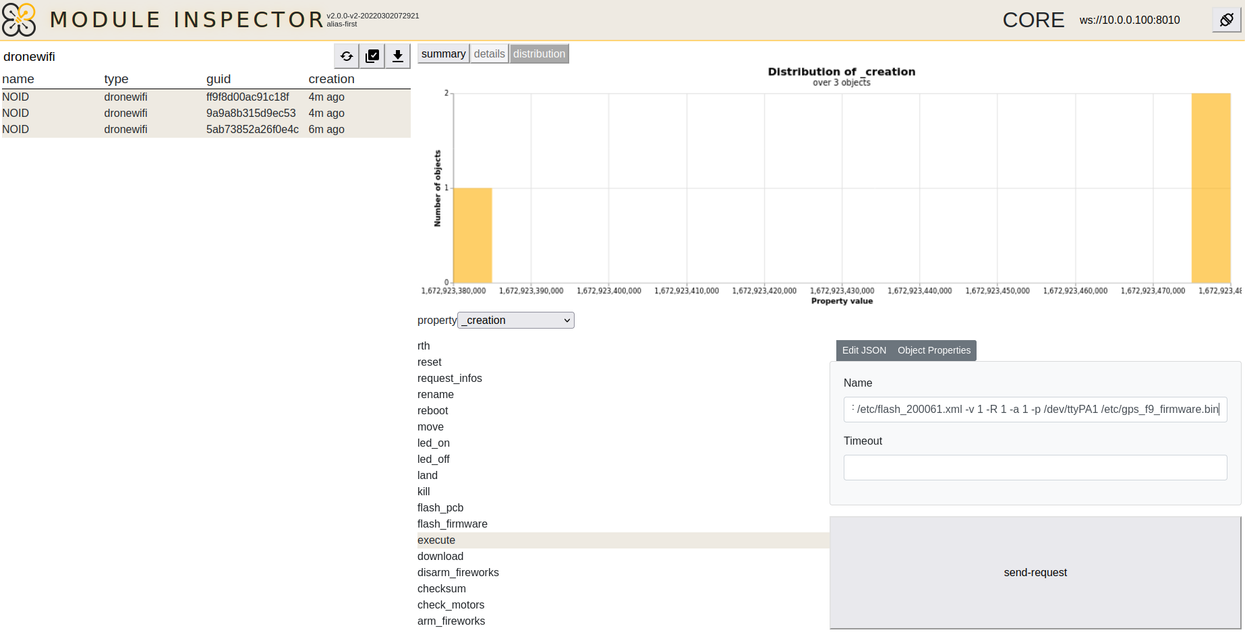
dronisos-module-inspector.
- Click on the connect button located on the top-right of the interface. Make sure that the url is
ws://10.0.0.100:8010.

-
Type
dronewifiinto the search bar and select all the drones available. -
Send an
executecommand, leaving thetimeoutinput blank and filling thenameone as follows:
pstop dragon-prog && maestro clients ublox stop && ubxfwupdate -F /etc/flash_200061.xml -v 1 -R 1 -a 1 -p /dev/ttyPA1 /etc/gps_f9_firmware.bin.
- Wait 5 minutes for the flashing to complete then soft-reboot all the drones via the DCC.
Flashing one F9P chip using a cable
This procedure is useful for debugging as it shows logs and possibly the reason why the flashing has not succeeded.
Method
This procedure is possible starting from the 2.10.0 Zephyr firmware.
-
Connect to the drone via ssh (Link to the ssh connection page TODO)
-
Enter root mode via
sudo su -
Stop maestro via
pstop maestro -
Stop the flight controller via
pstop dragon-prog -
Flash using
ubxfwupdate -F /etc/flash_200061.xml -v 1 -R 1 -a 1 -p /dev/ttyPA1 /etc/gps_f9_firmware.bin -
Once the f9p chip is flashed you need to reboot the drone via DCC.